![How to Create an Automated Email Sequence [Flodesk Workflows Tutorial]](https://bloggingwithlidiya.com/wp-content/uploads/2026/01/how-to-create-an-automated-email-sequence-flodesk-workflows-tutorial.jpg)
How to Create an Automated Email Sequence [Flodesk Workflows Tutorial]
Welcome to another tutorial for Flodesk users who want to grow their email list and do email marketing the right way.
Today, we’ll talk about automated email sequences and how to create yours using Flodesk.
If you haven’t signed up for Flodesk yet, you can do so here.
Let’s dive in.
What’s an Automated Email Sequence?
Ever signed up to someone’s newsletter or grabbed a freebie they offered via a sign-up form? The next thing that happened is you probably received an email (with the freebie, a welcome one or one prompting you to confirm your subscription).
After that, you likely received a series of emails over the course of a few days or weeks where that person introduced themselves to you, shared some of their content, a personal story, or how you can work with them (and maybe even a discount for their product or service).
That’s an example of an email sequence, and it’s automated so those emails are sent to people who join their email list.
You create them once, and they do the work for you from then on.
Basically, it’s a series of pre-written emails that are sent to a specific group of people based outriggers or timelines.
Here are the elements of an email sequence:
Triggering Event: It starts when a specific event occurs, such as a person signing up for your newsletter, making a purchase, or downloading a resource. The triggering event sets off the email automation.
Email Sequence: The emails are sent out in a predetermined order, spaced out over time (e.g., a welcome email immediately, followed by a follow-up email a few days later). Each might serve a different purpose, like introducing your brand, offering value, or encouraging the recipient to take a certain action (e.g., buy a product, sign up for a webinar, etc.).
Personalization: Many automated sequences can be personalized based on the user’s behavior or profile. For example, if someone clicks on a product link in an email, the next email could focus on that product.
Goal-Oriented: The goal of an automated email sequence could be to convert leads into customers, nurture relationships, keep your audience engaged, or provide relevant information at key moments.
Benefits
There are many reasons to set up sequences in your email marketing and for your business. Here are some of them:
It saves time and effort
Automation means less manual work. Once you set up a sequence, for example, the emails are sent automatically, so you don’t have to worry about drafting emails and sending them individually. This frees up time for other tasks.
You can create the emails once and they’ll run in the background 24/7, with little ongoing maintenance needed.
Depending on how well the other elements in your sales funnel are structured, you can also be earning passive income and making sales from your emails without doing any extra work.
Consistency in communication
By having a series of automated emails, you ensure your audience receives regular and timely messages without fail. That’s important for maintaining engagement and trust.
Once you’ve set that up, the only other emails you’ll have to send are your newsletters.
Improved engagement and customer experience
Automated sequences can be timed to send at optimal moments based on the user’s behavior, which often leads to better engagement rates (higher open and click-through rates).
For example, sending an email reminder about an abandoned cart within a few hours of the action might prompt the recipient to complete the purchase.
All this also creates a positive experience for your audience. This can build trust and loyalty with your brand.
Automated sequences are often part of customer onboarding, where users receive instructions, tips, and resources on how to get the most out of your product or service.
Scalability
As your business grows and your email list expands, an automated sequence can scale easily without needing a proportionate increase in effort or resources.
Whether you have 10 or 10,000 subscribers, your email sequence will work the same way, allowing you to reach a large audience without extra work.
Improves retention
You can also set up sequences that focus on retaining existing customers, like re-engagement campaigns for inactive subscribers or loyalty reward emails.
Retaining customers often costs less than acquiring new ones, and an automated sequence can help make sure they stay engaged.
Now that you know why sequences matter so much in email marketing, let’s create yours in Flodesk.
Below, I’ll list the steps but I’ll also keep it simple.
You can have many automated sequences, sales funnel, different offers, freebies, segments, etc. But if that overwhelms you, it’s not the best thing for your business.
Instead, you can start with 1 freebie, 1 opt-in form for it, and one welcome sequence.
Let’s see how to create that.

How to Create a Welcome Email Sequence in Flodesk
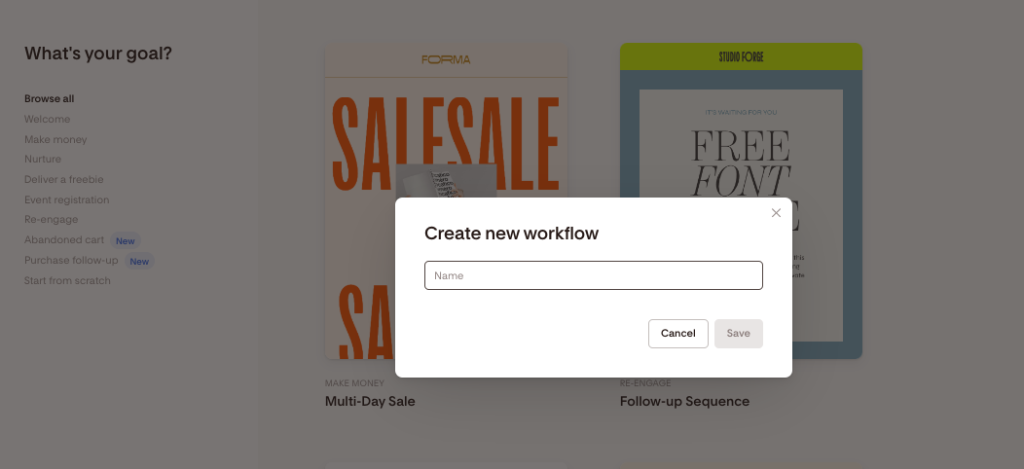
Step 1: Create a Workflow.
Inside Flodesk, go to Workflows. That’s how email sequences are called there.
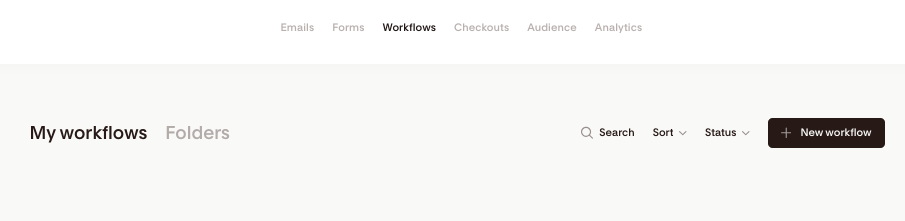
Click New Workflow.
You can start from scratch, or pick a template.
Let’s start from scratch.
Click that in the menu on the left and give your workflow a name.
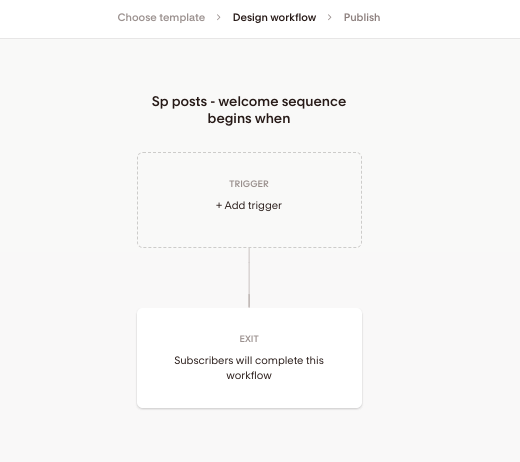
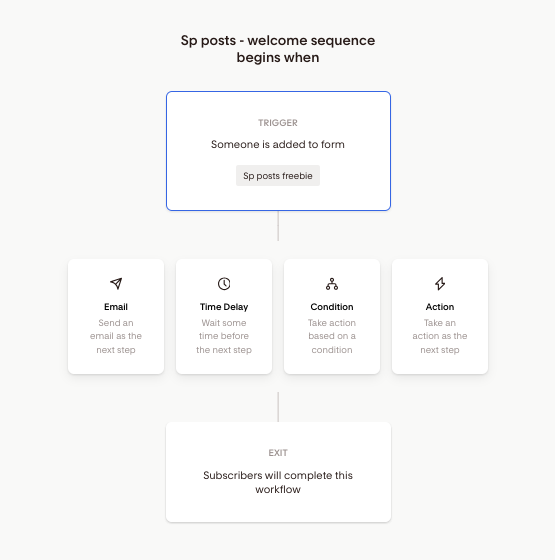
Step 2: Set a trigger.
The next step is to decide when the sequence begins. That’s by picking the event that will trigger it.
Click the first box to add a trigger.
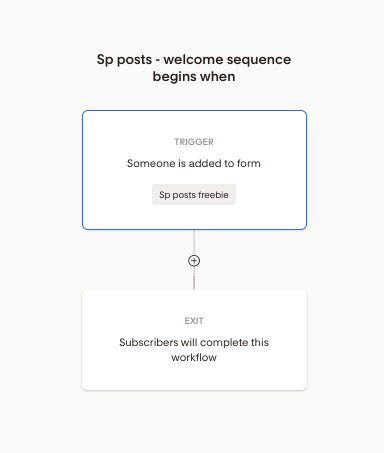
On the right, you’ll see options to choose from. The standard ones are to begin the workflow when someone subscribes through a form or is added to a segment.
Based on your choice, in the second dropdown menu you can choose the form or segment.
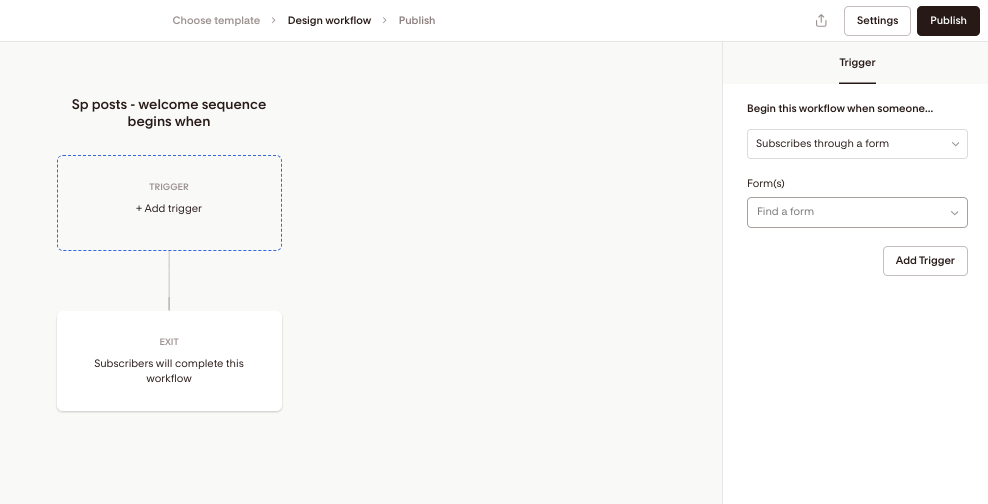
In the example I’m using, I want to create a welcome sequence for anyone who subscribes to my opt-in form offering a freebie on blog sponsorships. So I’ll choose that now.
By clicking ‘Add Trigger’, you can add another one. That can be practical if you have different freebies but want to send these people the same welcome sequence, for example.
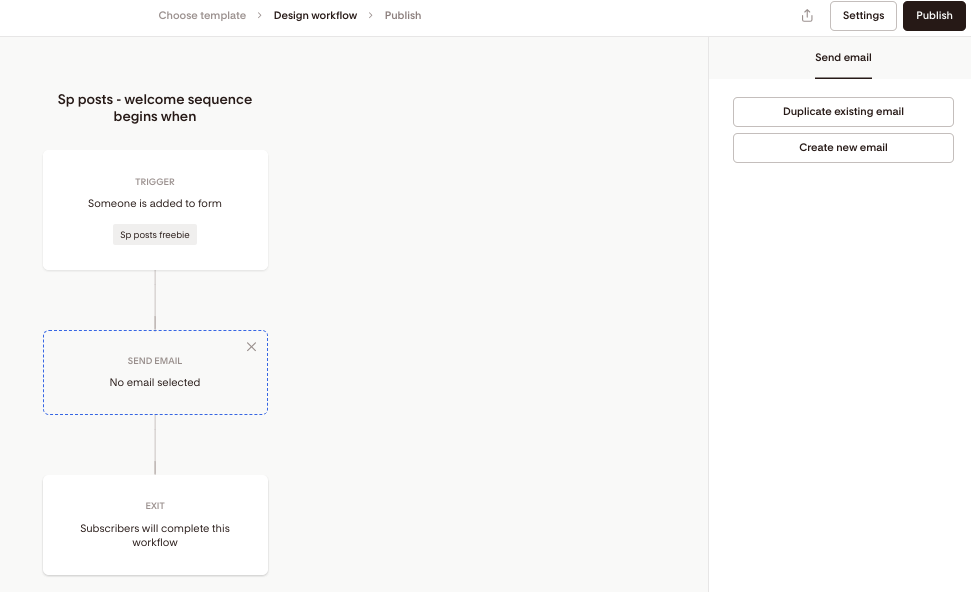
Step 3: Add emails.
When done with setting up the trigger, click the + icon to add your first email.
You’ll see 4 options. Let’s pick ‘Email’ now.
In the menu on the right, click ‘Create new email’.
On the next page, pick an email or create one from scratch. Flodesk offers beautiful templates. But make sure you personalize it (with your brand name and colors) if you use one.
And if you’ve created a template yourself (in the Emails tab), you can use it by going to ‘My favourites’.
That’s what I’ll do as I already personalized one email (for my newsletter) and want to stick to the same design.
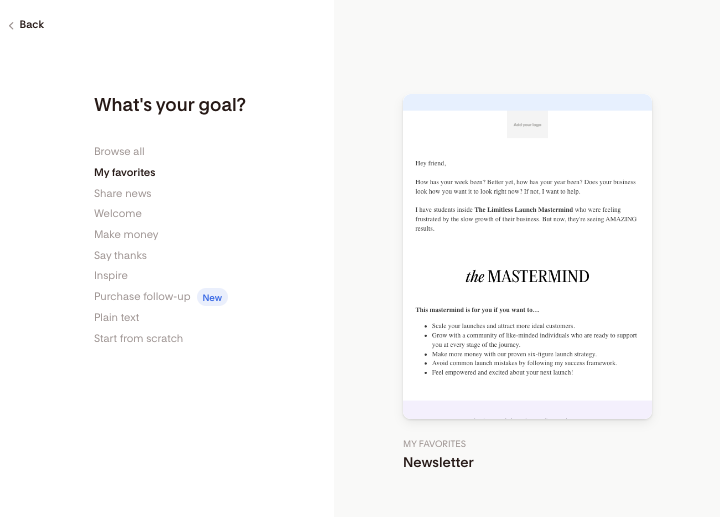
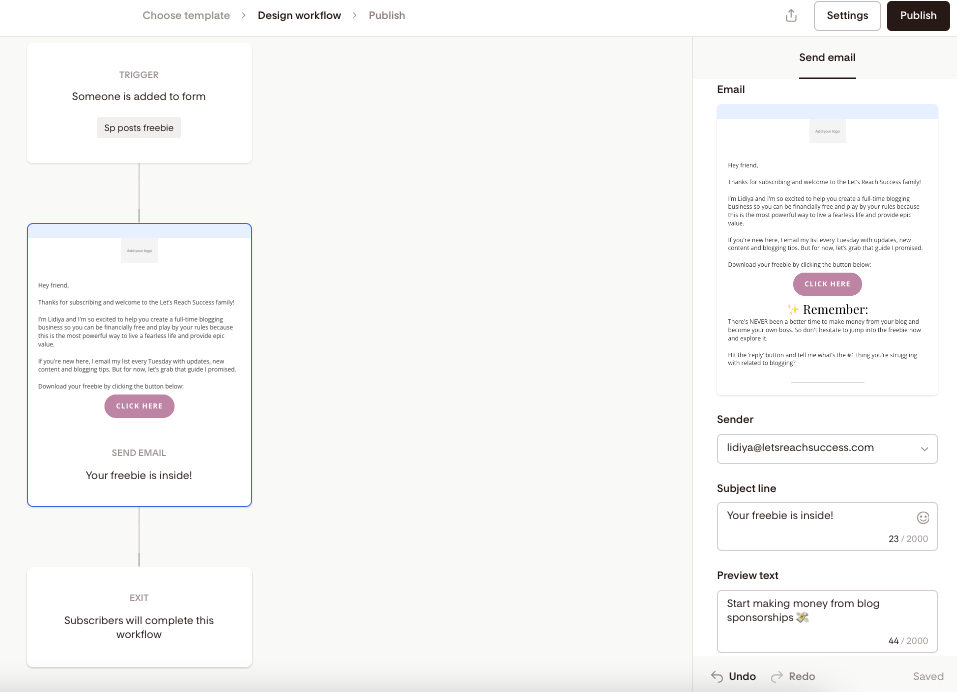
Whichever you go for, click ‘View Details’, then ‘Customize It’.
Design it in any way you like. You can also keep it simple, though, by just adding text, a quick intro, and giving access to the freebie.
When you’re done, click ‘Finish’.
There’s one final thing to do in this step. Once the email is added to the Workflow, on the right you can double check if the sender’s email (yours) appears correctly, add a subject line and preview text.
The preview text is the short line of text that appears next to or below your email subject line in your recipient’s inbox, right before they open your email.
It’s a key part of what subscribers see when deciding whether to open your email.
Step 4: Add time delays.
It’s time to space out our emails now. After all, you don’t want to send them all at once but to allow a day, two or more in between so new subscribers don’t get overwhelmed.
Hit the + icon again and this time choose Time Delay.
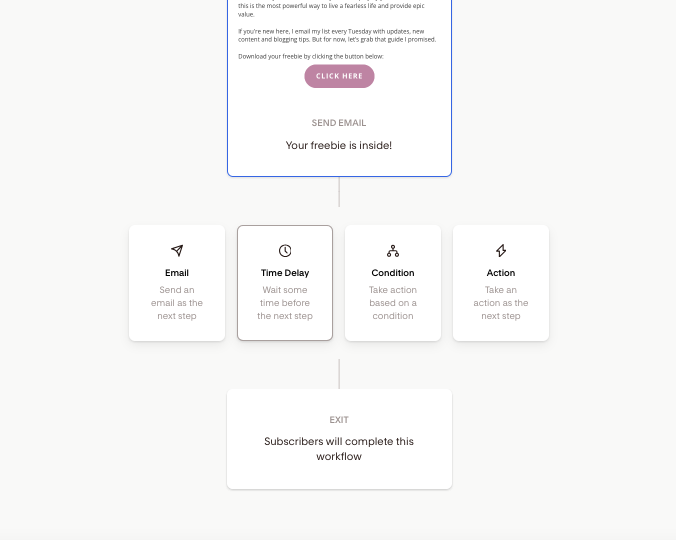
The menu on the right will give you different options. I’ll choose 1 day (between the email I created and the next one I’ll add).
That’s also the default option.

Step 5: Repeat this for every email.
This step will probably take the most time, depending on how many emails you want to include.
Follow the same process you saw above, and don’t forget to add time delays in-between them.
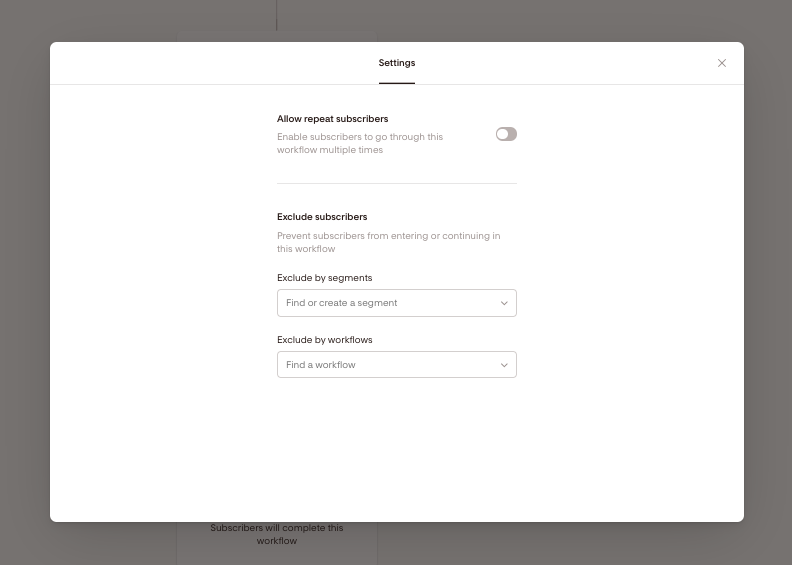
Step 6: Review workflow settings.
In the top right corner, you’ll see a Settings button.
Leave the first option toggled off (so the same people don’t go over that sequence again).
You can also exclude subscribers from a specific segment so they don’t enter or continue the workflow.
Step 7: Publish.
When you’re ready, close the Settings window and press Publish (top right corner).
Confirm you want to take that action, and your automated email sequence will be live. You can then see it in your workflows and edit it if necessary.
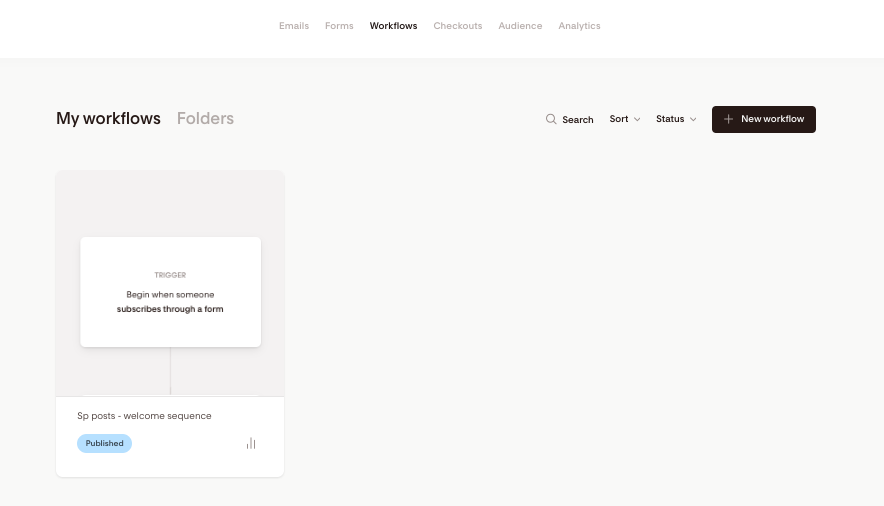
From now on, any time a subscriber signs up through the opt-in form connected to this workflow, they will start receiving the emails you prepared for them.
Got any questions about Flodesk workflows and email sequences? Let me know in the comments below.