
How to Embed a Flodesk Opt-in Form in WordPress
In this post, I’ll show you how to embed opt-in forms from Flodesk to your WordPress site so you can get subscribers.
We’ll do things more manually here as compared to other email marketing providers that have their own WordPress plugin. You’ll add the code yourself to your site instead. Let me show you how.
Not on Flodesk yet? Sign up through my link and get 50% off your first year!
Step 1. Create your opt-in form.
For a start, have everything ready inside Flodesk.
That includes:
- Exporting your subscribers from your old email marketing tool and importing them to Flodesk (if you’re switching platforms);
- Authenticating your domain;
- Having a freebie to offer to your subscribers;
- Designing an opt-in form inside Flodesk;
- Setting it to trigger a workflow once someone subscribes;
- Setting up your double opt-in email (optional but always a good idea). If you do that, also customize the confirmation email and thank-you page link;
- Your welcome email (the first email people get after subscribing);
- A sequence (your automated workflow that will keep new subscribers engaged automatically).
That’s where most of the work is done, and embedding the forms is the final step. It’s also quite quick and easy. So make sure you do everything correctly before that.
Step 2. Get the embed code.
Once you have at least one form, let’s get its code.
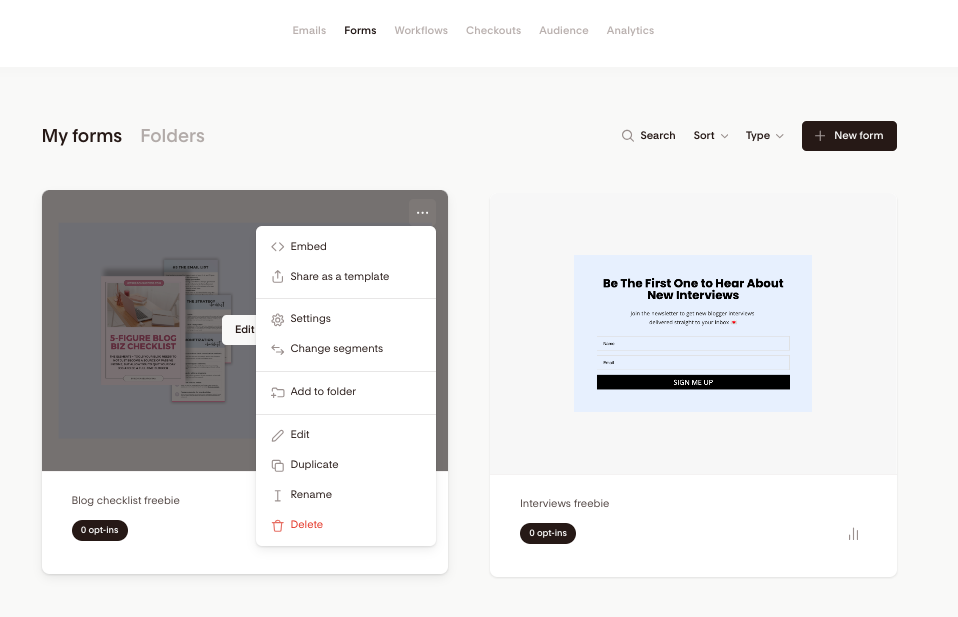
Inside Flodesk, go to Forms, click on the 3 dots for the form you’d like to add, and press Embed.
You’ll see 3 options on the window that pops up. Let’s go for an inline form, which means adding a sign-up box inside a blog post on your site.
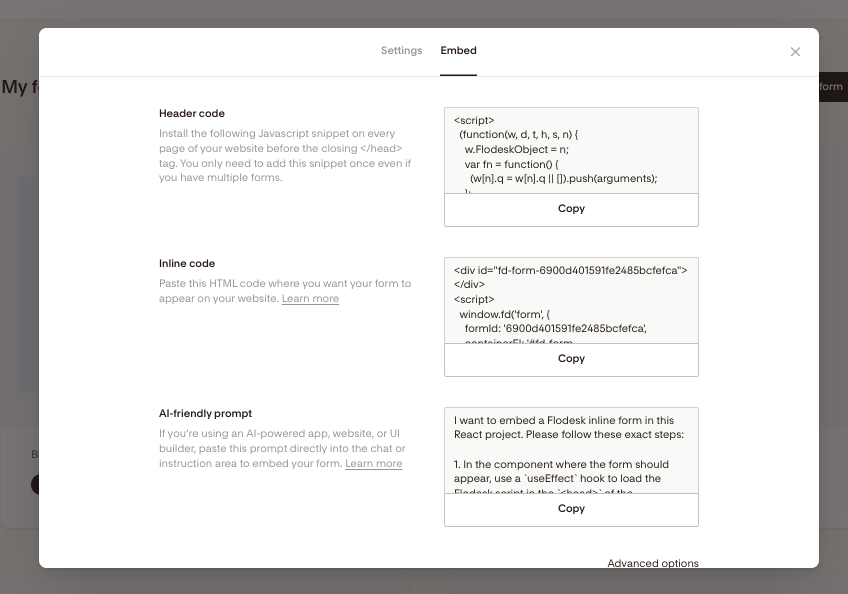
The interesting thing here is that you’ll need to add both the Header code and the Inline code. The first action happens once and in your theme settings, and the second is done for every individual blog post or section of your site like footer or sidebar.
Both snippets must be added for the form to appear and function correctly, so let’s see how to do that. There are 2 options.
Step 3. Add the Header code.
Option 1 (manually): Add via your theme
You can use a header/footer plugin for that, but you can also do it manually.
- From your WordPress dashboard, go to Appearance → Theme File Editor (sometimes called “Editor”).
- On the right, click header.php.
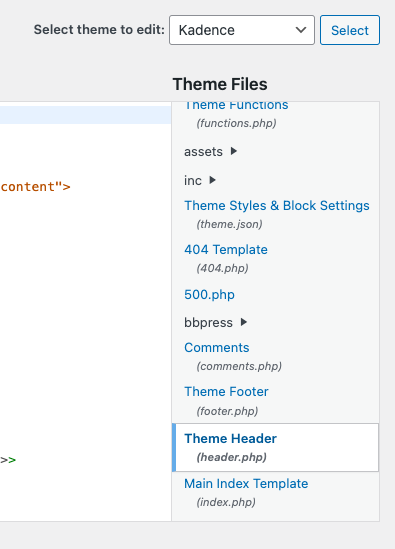
- Look for the line that says: </head>
- Paste your Flodesk header code just above that line.
- Click Update File to save.
Done. The code is now active sitewide. For each opt-in form embed, you will see the same header code, so you don’t need to add it again.
Some themes allow inserting code from the customization options too (Appearance > Customize). This is much easier.
The other way is to install a plugin.
Option 2 (safer) : Use a header/footer plugin
I went for this option. For that, we’ll need a simple WordPress plugin that allows us to insert code in the header or footer of our site.
I chose WPCode. It’s the most popular one so you can’t go wrong with it.
Here are the steps.
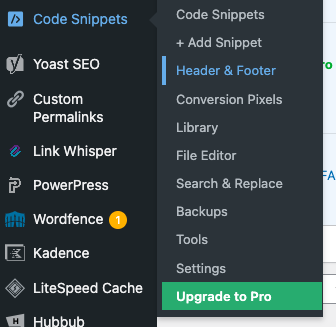
- Install and activate WPCode (or a similar plugin).
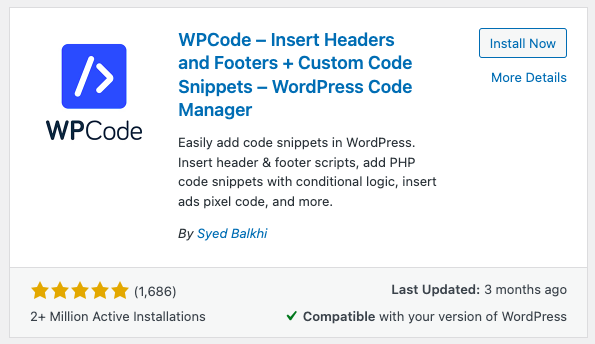
- Find it in your WP Dashboard under Code Snippets.
- Go to Code Snippets > Header & Footer.
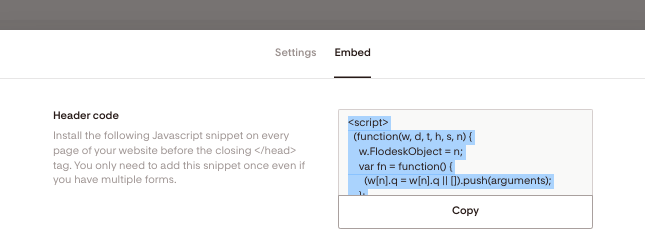
- Copy the Header code from Flodesk.
- Insert it in the Header section inside the plugin.
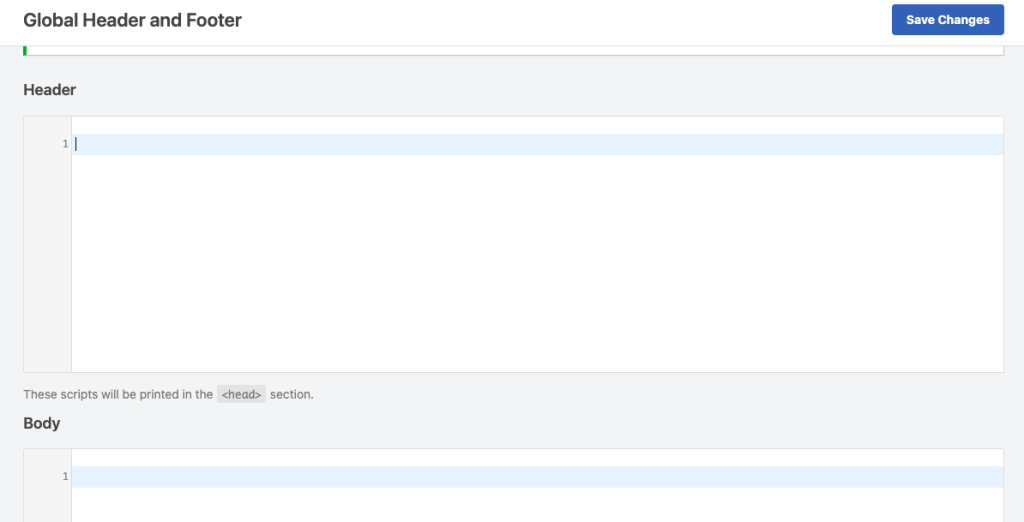
- Save changes.
Step 4. Add the Inline code.
Now that we’ve added the header code, we can also add the inline one.
Copy it from Flodesk.
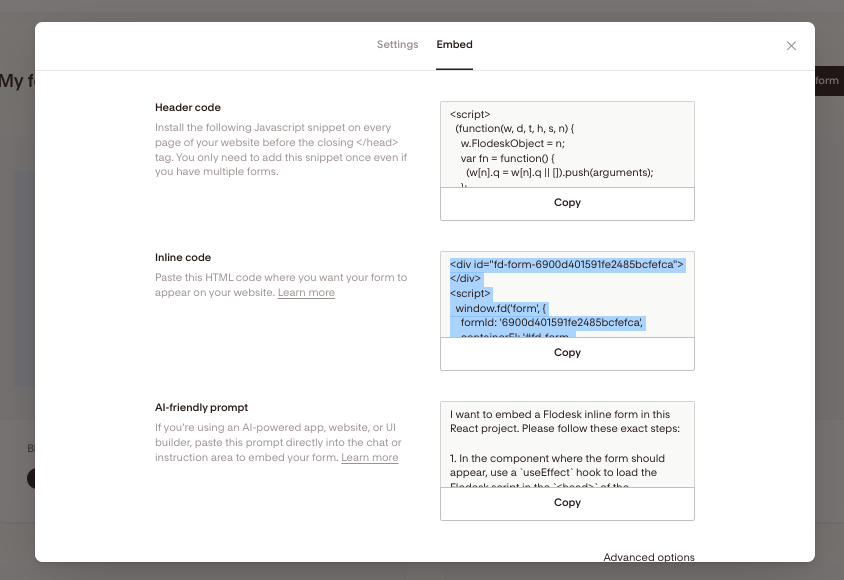
Pick a blog post and a section inside you’d want your opt-in form to appear in and insert the inline code form Flodesk.
Step 5. Test your opt-in form.
Finally, don’t forget to test your newly inserted form as if you’re a subscriber.
You can also check how it appears on mobile and from another browser, then sign up for it with another email you have and see if everything works well.
Look for a success message, see if you receive a welcome email right away and if every link is working in it, and all the other details.
So that’s how you embed a Flodesk opt-in form in WordPress.
Want 25% off your first year on Flodesk? Grab it here through my link.
Let me know if you have any questions.


![How to Create an Automated Email Sequence [Flodesk Workflows Tutorial]](https://bloggingwithlidiya.com/wp-content/uploads/2026/01/how-to-create-an-automated-email-sequence-flodesk-workflows-tutorial-768x432.jpg)